Category: Bars
-
Coconut Bounty Bars (sugar-free)

These vegan Coconut Bounty Bars are one of the easiest bars that you can make at home. You can enjoy almost the same taste as the original Bounty bars, but with much healthier ingredients. Only a few ingredients and 15 minutes of your time and you will get coconutty, healthy, vegan grab-and-go homemade Coconut Bounty…
-
Chocolate Nut Clusters
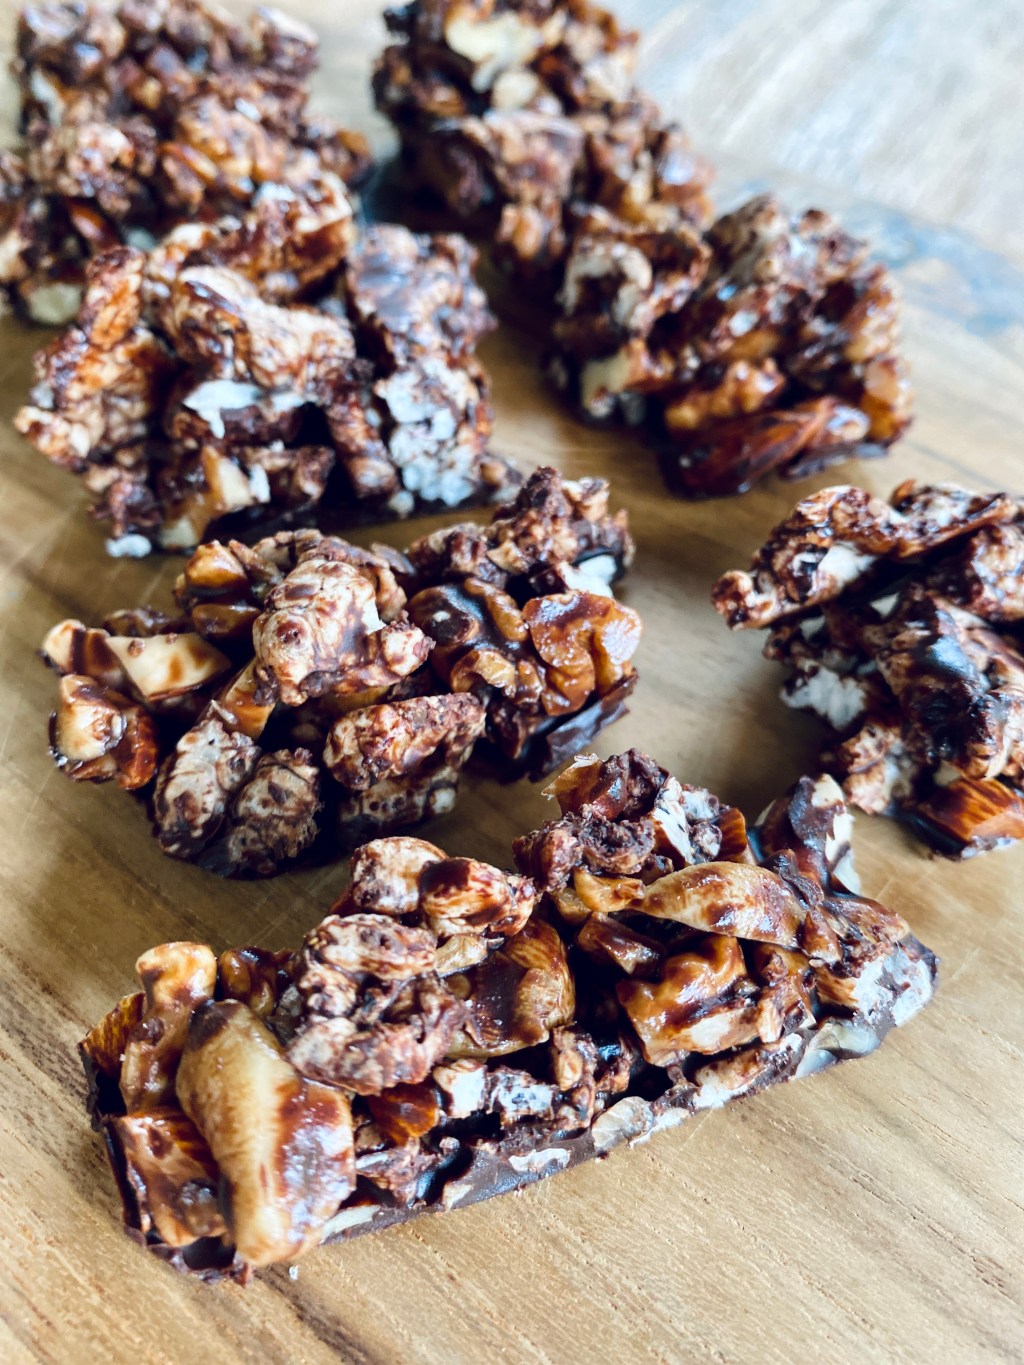
This is one of the easiest snacks you can ever cook. Chocolate Nut Rice Cake Clusters are crunchy, easy to make, and consist of only a few ingredients. Chocolate Nut Clusters could be your everyday snack with the afternoon coffee and it can be a great last-minute gift to friends and family, besides nut clusters…
-
SNICKERS ICE CREAM BARS (VEGAN AND Sugar-free)
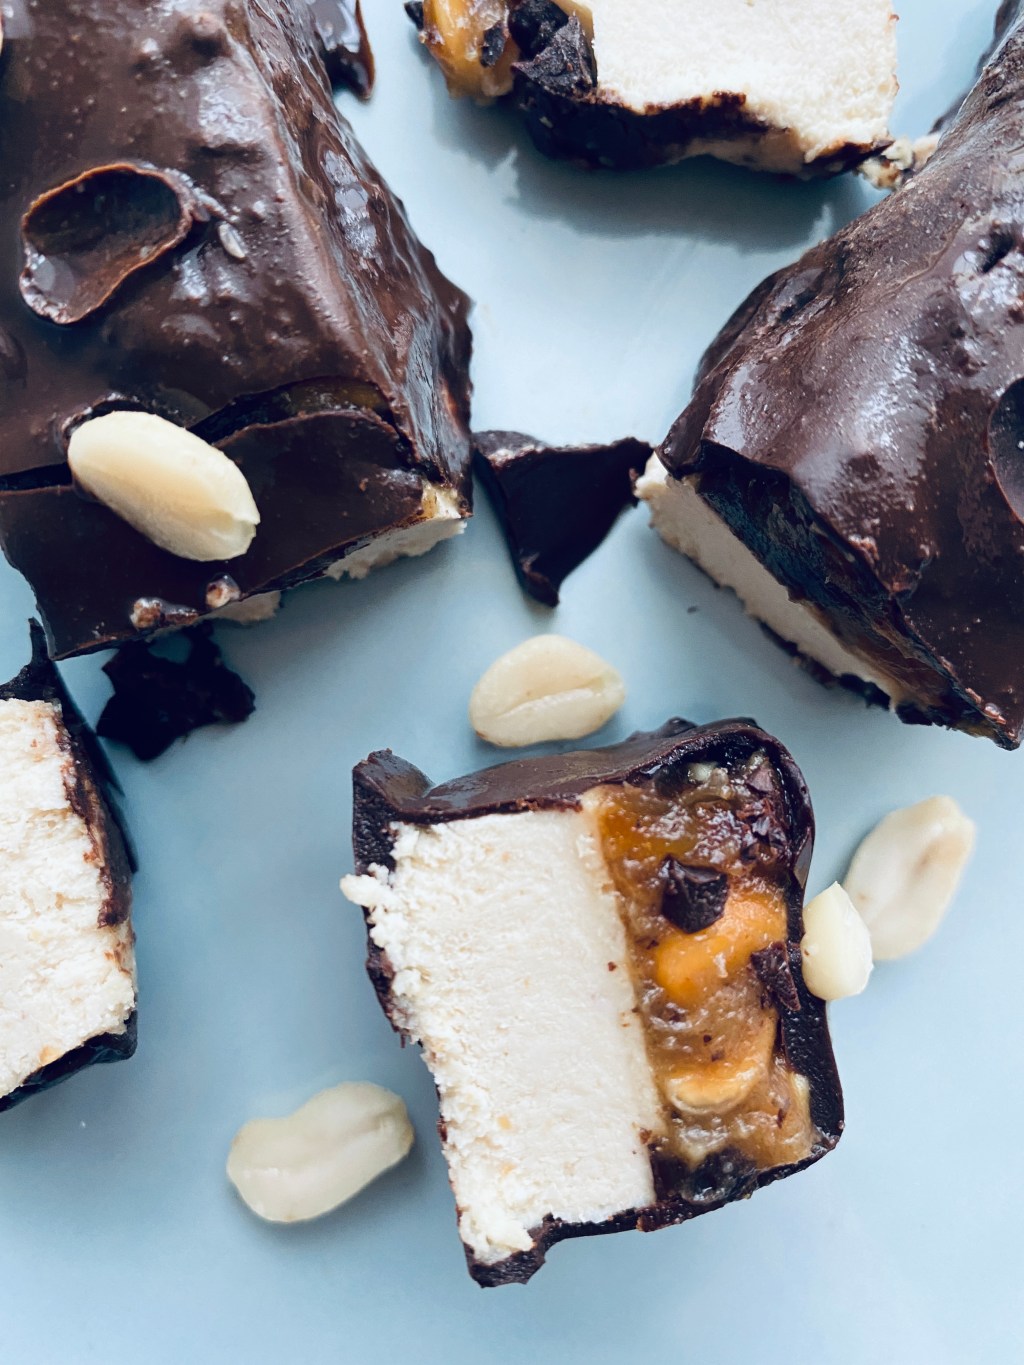
Snickers are the classic from sweet bars. I think this is one of the most popular sweet snack bars. I also find it delicious, but I wanted to make it healthier from natural ingredients, without refined sugar and other unhealthy ingredients.I’ve made classic Healthy Snickers Bars as well, you can find the recipe in my…
-
PEANUT PROTEIN BARS (NO-BAKE, SUGAR-FREE)
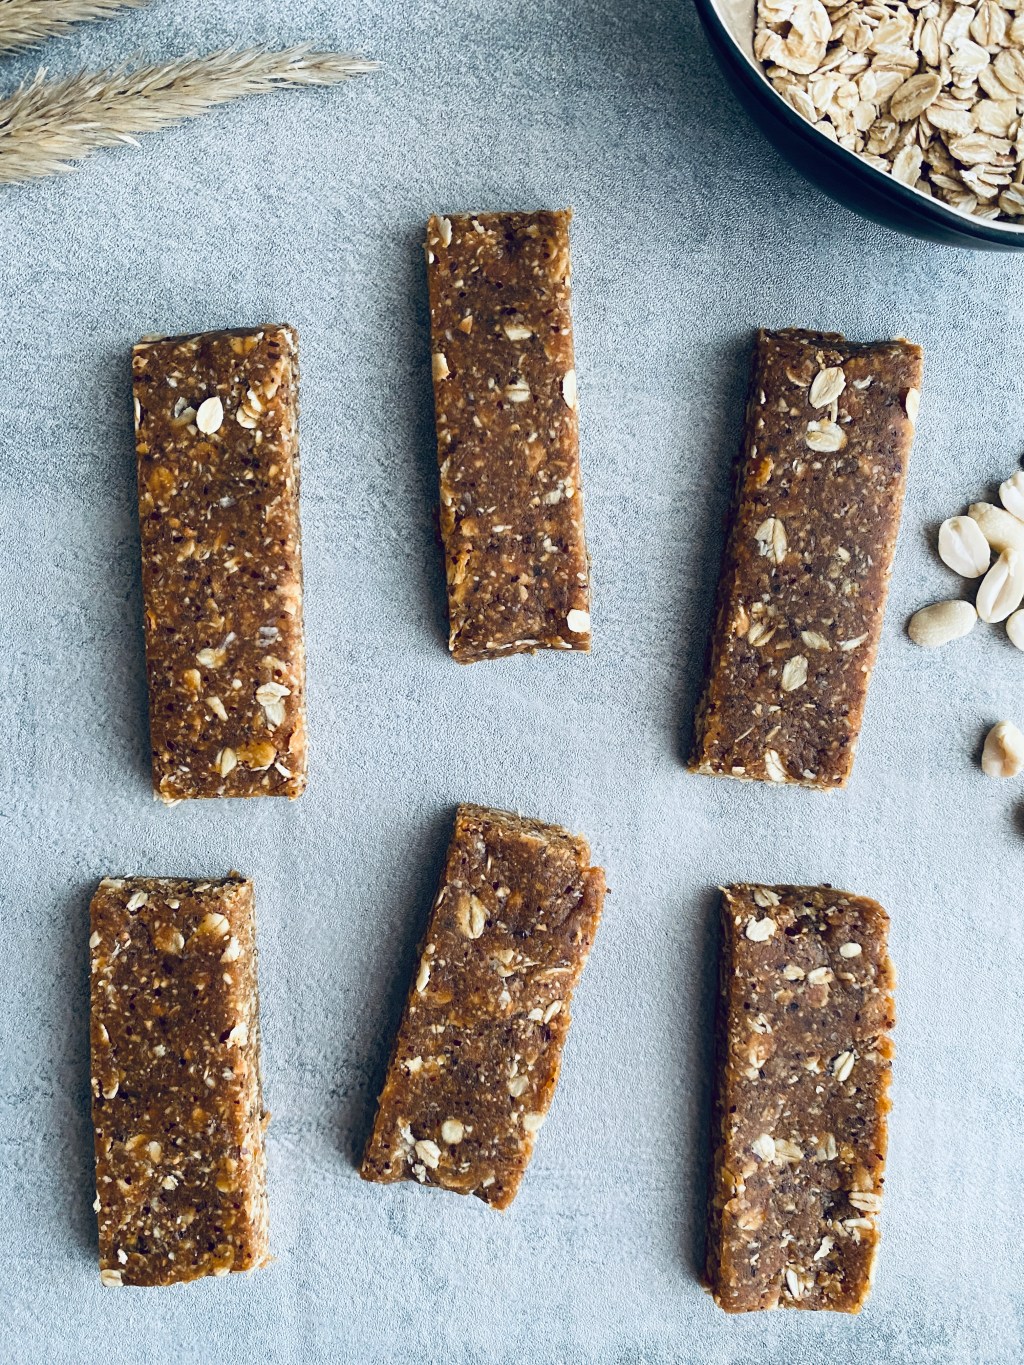
These healthy homemade Peanut Protein Bars will be a great snack before or after the workout, or whenever you are hungry. They are super easy to make because they consist of only 3 ingredients and you can make them without baking. Peanut Energy Bars are healthy because they are made from natural ingredients, high in…
-
BLACKCURRANT CHOCOLATE BARS (sugar-free, vegan)

Blackcurrant Chocolate Bars are fruity, slightly sour, but with a sweet and juicy layer of jam. These Blackcurrant Bars will be a delicate healthy dessert whenever you want something sweet. They are healthy and guilt-free dessert because they contain only natural sugar from blackcurrants and honey. Blackcurrant Chocolate Bars also are vegan, lactose-free, and white…
-
HEALTHY SUGAR-FREE MARS BARS

Healthy Sugar-free Mars Bars are super delicious and a great alternative to real ones. Healthy Mars Bars are creamy, soft and filled with sweet caramel. It took time to figure out the best combination. Mars Bars are quick to make, but most of the time takes for the freezing process. Healthy Mars bars are sugar-free,…
-
RASPBERRY CHOCOLATE ENERGY BARS (SUGAR-FREE)

These Raspberry Chocolate Energy Bars loaded with juicy raspberry jam are one of my favorite healthy bars. This combination is adorable, sweet chocolate with fresh and juicy raspberries creates an unforgettable taste. These Raspberry Chocolate Energy Bars are healthy, because they are refined sugar-free and vegan. You definitely have to try them. You May Also…
-
HEALTHY HOMEMADE ENERGY BARS

Healthy homemade energy bars are a perfect snack when you are hungry or just craving something delicious or sweet, then this could be your healthy choice. Healthy energy bars are easy and fast to cook, no-bake, sugar-free, and lactose-free. Choose Healthy Snack – Homemade Energy Bars You may also like: Plum Nut Bars With Chocolate…
-
Healthy Chocolate Plum Bars
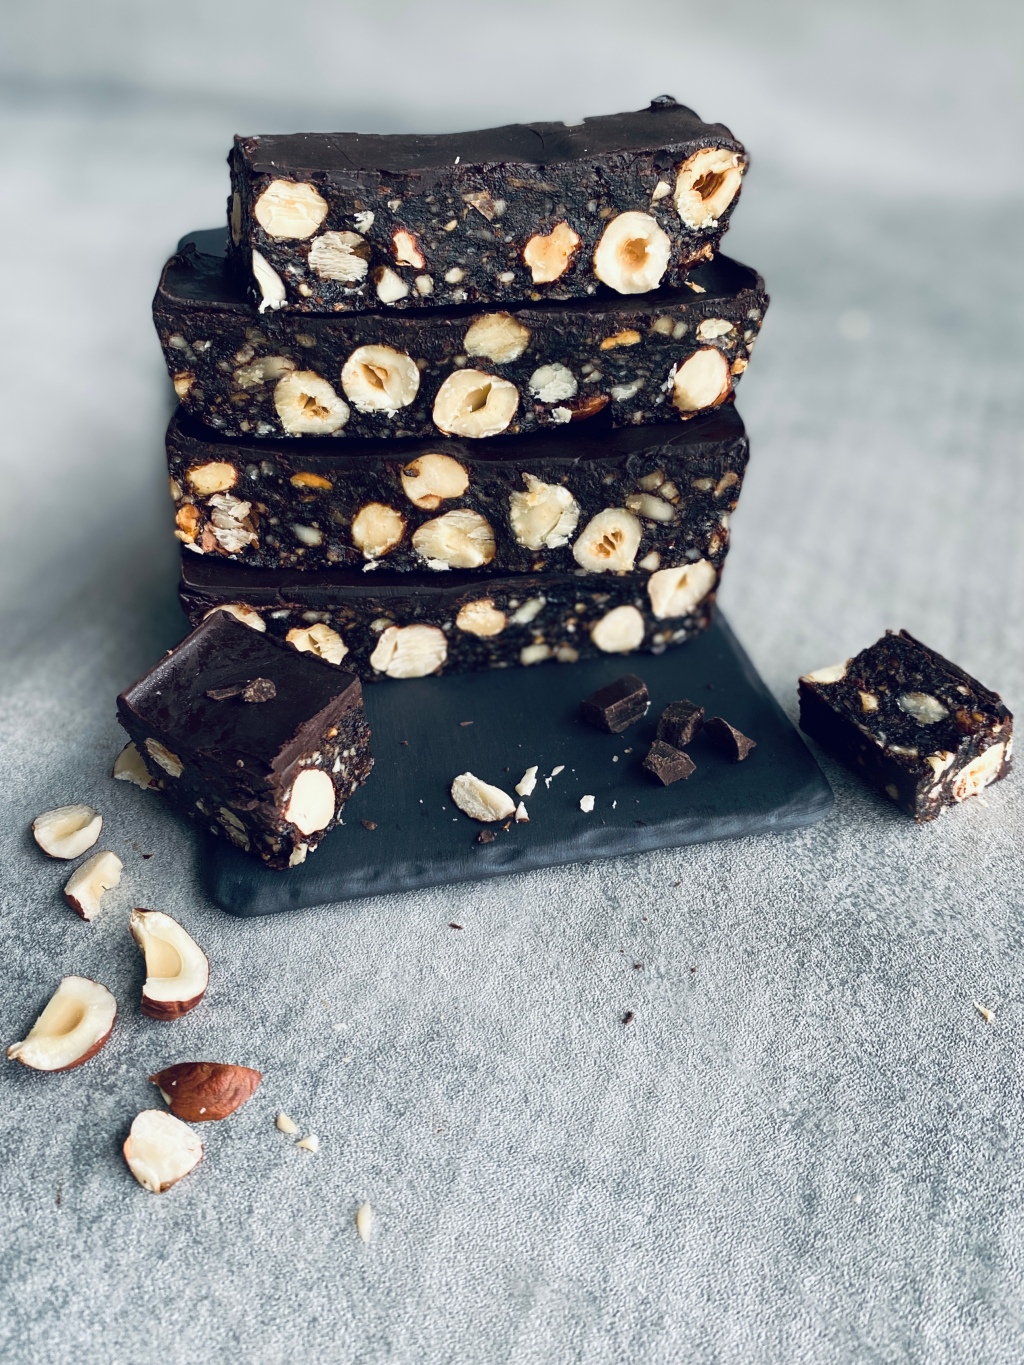
Chocolate Plum Bars are one of my favorite energy bars. I love the combination of plums and chocolate. These bars are sugar-free, vegan, dairy-free and so delicious. Be careful, I couldn’t stop to eat one after another. 🙂 Chocolate Plum Bars are covered with rich and sweet chocolate, loaded with crunchy hazelnuts and super soft…

